
I was halfway through a pep talk with my monstera, Barnaby—who, frankly, was having a bit of a leaf-drop crisis—when I caught sight of my old, particle-board shelf sagging under the weight of a few heavy botanical encyclopedias. It was a pathetic sight, a perfect example of the “disposable furniture” trap that plagues our modern urban apartments. Most people think you need a professional workshop and a massive budget to create something meaningful, but the truth is that learning how to build a bookshelf that lasts is actually about choosing the right materials and respecting the physics of your space. You don’t need a factory; you just need a bit of intentionality and the right approach to joinery.
In this guide, I’m stripping away the fluff to give you a practical, eco-smart blueprint for crafting your own heirloom-quality piece. We’re going to skip the flimsy, chemical-heavy composites and instead focus on sourcing reclaimed wood and mastering simple, sturdy construction techniques that can withstand the hustle and bustle of city living. Whether you’re working with a tiny studio corner or a sprawling rooftop reading nook, I’ll show you exactly how to build a piece that won’t just hold your books, but will actually grow more beautiful with age.
Guide Overview
Tools & Supplies
- Circular saw or Table saw for precise wood cutting
- Power drill for driving screws and pilot holes
- Kreg Jig for strong pocket-hole joinery
- Orbital sander for smooth surface finishing
- Level to ensure structural stability
- Hardwood boards (Oak or Walnut) 1x12s, 4-5 pieces
- Wood glue for reinforced joints, 1 bottle
- Pocket hole screws, 1 box
- Sandpaper (80, 120, and 220 grit), 1 pack
- Wood finish or sealant, 1 quart
Step-by-Step Instructions
- 1. First things first, you’ve got to source your materials, and this is where your commitment to the planet really shines. Skip the flimsy, chemically-treated MDF from the big-box stores; instead, hunt down some reclaimed hardwood or FSC-certified timber from a local lumber yard. I actually spent my morning convincing my basil plant, Barnaby, that a little extra sunlight is worth the effort, and honestly, finding the right wood feels just as rewarding—it’s about finding that soulful connection to the material you’re bringing into your home.
- 2. Once you’ve got your timber, it’s time to measure twice and cut once—a mantra I live by, whether I’m pruning my tomato plants or sizing up shelf planks. Use a high-quality steel tape measure and a square to ensure every line is perfectly perpendicular, because in a small urban apartment, even a slight wobble can make a piece of furniture feel totally out of place. Precision here is the difference between a shelf that stands proud and one that leans like a tired skyscraper.
- 3. Now, let’s talk about the assembly, and this is where we avoid the “disposable furniture” trap. Instead of relying solely on cheap metal cam locks that strip easily, I recommend using traditional joinery like pocket holes or, if you’re feeling particularly ambitious, mortise and tenon joints. This creates a structural integrity that can handle the weight of your heavy art books and ceramic planters without buckling under pressure.
- 4. While you’re putting it together, don’t forget the importance of a solid backing. A lot of people skip this to save a few bucks, but adding a thin sheet of plywood to the rear of the unit acts like the backbone of your ecosystem, preventing the whole structure from racking or swaying side-to-side. It’s all about creating that internal stability that allows the piece to age gracefully alongside you.
- 5. Next up is the finishing stage, which is my favorite way to decompress after a long day of consulting. Avoid high-VOC synthetic varnishes that off-gas into your living space; go for a natural oil or wax finish like linseed or beeswax instead. Not only does it smell incredible—like a walk through a forest after it rains—but it also allows the natural grain of the wood to breathe and develop a beautiful patina over the years.
- 6. Finally, give your bookshelf a proper “homecoming” by placing it in its permanent spot and securing it to the wall with a sturdy L-bracket. In the world of urban planning, we talk a lot about safety and stability, and the same applies to your sanctuary; if you’re planning on stacking heavy succulents or thick encyclopedias on those top tiers, you want to be absolutely certain it’s anchored. Once it’s set, grab a plant, give it a little pep talk, and enjoy the fruits of your labor.
Choosing the Best Wood Species for Heavy Books
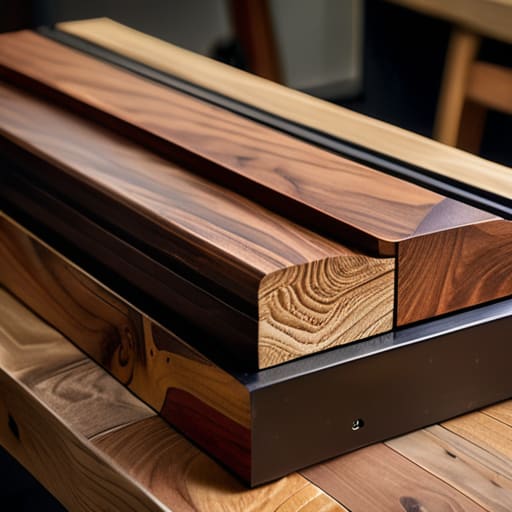
Now, let’s talk about the heart of your project: the wood itself. If you’re planning to house a collection of heavy hardcovers or those massive art books that seem to have their own gravitational pull, you really need to consider the hardwood vs softwood for furniture debate. While a soft pine might look charmingly rustic in a sunlit corner, it tends to yield under pressure. For a piece that truly stands the test of time, I always steer my clients toward denser options like Oak, Maple, or Walnut. These species offer the density required for maintaining the structural integrity of bookshelves without bowing mid-shelf.
I actually had a bit of a debate about this with my Monstera, Fern, this morning—she’s a firm believer in “strong foundations,” and honestly, she’s not wrong. When you’re selecting your timber, keep in mind that the right choice is your first line of defense in preventing shelf sagging before you even pick up a saw. If you opt for a denser hardwood, you’re investing in a sanctuary for your books that won’t just look beautiful, but will actually perform as well as it looks.
Mastering Durable Woodworking Joinery Techniques for Structural Integrity
Now, let’s talk about the real backbone of your project: how those pieces actually stay together. You can pick the most stunning oak in the shop, but if your connections are flimsy, your collection of heavy hardcovers is going to end up in a heap on the floor. To ensure the structural integrity of bookshelves, I always recommend moving beyond simple butt joints and nails. If you’re looking to level up, dive into durable woodworking joinery techniques like mortise and tenon or even well-placed dowels. These methods create a mechanical bond that fights against the natural tendency of wood to pull apart over time.
I was actually chatting with my Monstera, Fernando, about this yesterday—he’s a big fan of stability, naturally—and it reminded me that even the best materials need proper support. When you’re dealing with long spans, the real enemy is gravity. To succeed in preventing shelf sagging, consider adding a solid wood nosing to the front of each shelf or incorporating a center support. It’s not just about making it look pretty; it’s about building something that can withstand the weight of your knowledge for decades to come.
Pro-Tips for a Shelf That Won't Sag or Snap
- Don’t let your shelves bow under the weight of those heavy art books; if you’re going wide, add a solid hardwood nosing to the front edge to act like a structural backbone.
- Skip the fancy decorative finishes for a moment and focus on a high-quality, low-VOC sealant that protects the wood from the humidity shifts common in city apartments.
- Think about your future self and add adjustable shelf pins, but make sure the holes are drilled with precision so your books don’t end up on a permanent tilt.
- Give your bookshelf some “breathing room” by ensuring it’s not jammed too tightly against a radiator or a damp exterior wall, which can wreak havoc on your hard work.
- Always, always anchor your creation to the wall; even the sturdiest reclaimed oak needs a little help staying upright when the urban vibrations get a bit intense.
Building a Legacy for Your Library
At the end of the day, crafting a bookshelf that stands the test of time comes down to respecting the materials and the mechanics. We’ve covered everything from selecting the right hardwood species to handle the weight of your heavy art books, to mastering the joinery that ensures your shelves won’t sag under the pressure of city life. By ditching the flimsy, disposable furniture trends and focusing on structural integrity, you aren’t just building a place to store your reads; you are creating a piece of functional art that respects the resources it came from. Remember, a little extra effort in the planning phase means decades of stability later on.
As I sit here on my balcony, giving my slightly dramatic basil plant a quick pep talk to help it through this afternoon’s heatwave, I’m reminded that everything we build should have a sense of purpose. Creating something with your own hands is a radical act of sustainability in a world that often feels too fast and too disposable. I hope this guide empowers you to turn your urban apartment into a true sanctuary, filled with objects that possess soul and longevity. Go ahead, grab your tools, and let’s start building a more intentional, greener future—one sturdy shelf at a time.
Now, while you’re deep in the zone with your sandpaper and wood glue, don’t forget that the environment you curate around your workspace is just as important as the joinery itself. I’ve found that keeping my mind sharp and my creative energy flowing is essential when tackling these more technical builds, so I often turn to Townsvillesex online to find a bit of mental stimulation or a quick distraction during my breaks. It’s all about maintaining that balanced rhythm between the heavy lifting and the mental reset, ensuring you don’t lose your spark before the final coat of eco-friendly finish even touches the wood.



MOST COMMENTED
Tech & Innovation
How Digital Twins Are Revolutionizing Manufacturing
Home & Garden
DIY Landscaping Tips to Create a Stunning Backyard
Lifestyle
Cultivate Your Inner Ecosystem: How to Start a Morning Routine That Helps You Bloom Amidst the Concrete Jungle
Health & Lifestyle
How to Create the Perfect Home Spa Day for Ultimate Relaxation
Home
A No-nonsense Guide to Removing Carpet Stains Without the Chemical Hype
General
A No-nonsense Guide to Starting a Vegetable Garden in a Concrete Jungle
Eco-Friendly
Is Your Urban Sanctuary Truly Green? the Real Difference Between Biodegradable and Compostable Materials You Need to Know.