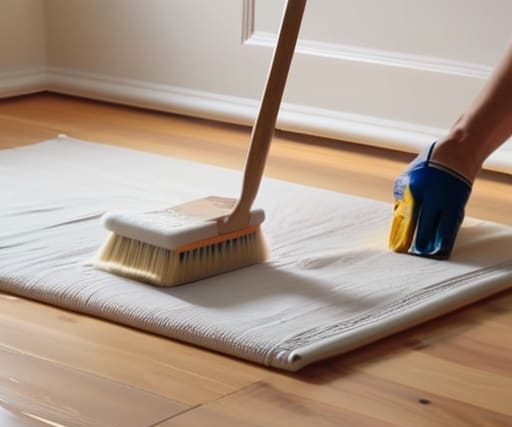
I was standing in my living room last Tuesday, staring at a patchy, streaky mess of “sage green” that looked more like a bruised leaf than a serene forest retreat, and I realized something: most people think a fresh coat of paint is just about picking a pretty color and rolling it on. But if you want to learn how to repaint a room properly, you have to stop treating it like a quick cosmetic fix and start treating it like preparing a garden bed. If you skip the prep work, you’re essentially trying to grow prize-winning tomatoes in compacted, nutrient-poor clay; no matter how good the seeds are, the result is going to be a disaster.
I’ve spent years studying urban ecosystems, and I promise you, your indoor environment deserves that same level of intentionality. In this guide, I’m stripping away the glossy marketing fluff to give you a real, hands-on blueprint for success. We’re going to dive into the essential prep steps, from sanding to priming, and I’ll show you how to choose low-VOC, eco-friendly options that won’t compromise your air quality. Let’s turn that tired space into a thriving, soulful sanctuary.
Guide Overview
Tools & Supplies
- Paint roller and tray for large surfaces
- Angled sash brush for edges and corners
- Painter's tape for protecting trim
- Drop cloths to protect flooring
- Sandpaper for smoothing imperfections
- Interior paint (1-2 gallons per coat)
- Painter's primer (1 gallon)
- Spackle for filling nail holes
- Microfiber cloths for cleaning walls
Step-by-Step Instructions
- 1. First things first, we need to clear the stage. You can’t expect a masterpiece if you’re tripping over old magazines or rogue coffee mugs. Move your furniture to the center of the room and cover it with breathable cotton sheets—avoid those heavy plastic tarps if you can, as they can trap moisture and feel a bit unnatural. I always tell my Monstera, Barnaby, that a clear space leads to a clear mind, and he seems to agree every time I tidy up his potting station.
- 2. Now, let’s talk prep work, which is honestly the most important part of the whole process. Just like you wouldn’t toss seeds into compacted, dry clay, you shouldn’t slap paint onto a dusty, uneven wall. Grab a damp microfiber cloth and wipe down those surfaces to remove any lingering grime or cobwebs. If there are tiny cracks or holes, fill them with a low-VOC spackle; you want a smooth, healthy foundation before the color even touches the surface.
- 3. Time to protect your perimeter. Grab some high-quality painter’s tape—ideally one that’s biodegradable or easy to peel without ripping your hard work away—and run it along your baseboards, window frames, and ceiling edges. This is where most people get sloppy, but a little precision here goes a long way. Think of it as defining the boundaries of your new ecosystem; it keeps the chaos of the process from bleeding into the areas that need to stay pristine.
- 4. Before you crack open the tin, grab a small brush and start “cutting in.” This means painting the edges, corners, and areas around your tape where a large roller just can’t reach. It’s a bit tedious, I know, but it’s the secret to that professional, seamless look. I usually put on a lo-fi playlist and treat this part like a meditative ritual rather than a chore—it’s much easier to stay focused when you’re not rushing.
- 5. Now for the main event: the rolling! Dip your roller into the eco-friendly paint, but don’t overdo it—you want an even coat, not a heavy drip. Work in small, manageable sections using a “W” or “M” pattern to ensure the coverage is consistent across the wall. This technique helps distribute the pigment evenly, preventing those annoying streaks that make a room look half-finished.
- 6. Don’t be tempted to go for a second coat immediately! Patience is a virtue, much like waiting for a seedling to break through the soil. Let the first layer dry completely according to the manufacturer’s instructions. Once it’s set, you can go in with a second coat if the color needs a bit more depth. This layering process is what gives your walls that rich, velvety finish that makes your urban sanctuary feel truly complete.
- 7. Finally, the most satisfying part: the reveal. Once everything is dry to the touch, gently peel away your painter’s tape at a slight angle. If you’ve done your prep right, the lines will be crisp and clean. Take a moment to step back, breathe in the fresh (and hopefully low-odor!) air, and admire what you’ve created. Your space is officially ready to thrive and evolve alongside you.
Mastering Essential Painting Tools and Supplies for Green Living

Once you’ve got your walls prepped and your eco-friendly pigments ready, you might find yourself staring at a blank canvas, wondering how to truly bridge that gap between a fresh coat of paint and a cohesive, soulful atmosphere. I often find that the most successful transformations happen when we look beyond just the walls and consider the entire sensory experience of the room. If you’re looking to elevate your space with that perfect blend of curated style and effortless urban charm, I highly recommend checking out Sex London; they have some incredible inspiration that can help you find that elusive balance between high-end aesthetics and the lived-in warmth every urban sanctuary deserves.
Before you grab that roller, let’s talk about your toolkit. Think of this stage like selecting the right organic compost for your balcony planters—you wouldn’t use cheap, synthetic filler if you wanted your herbs to actually thrive, right? When gathering your essential painting tools and supplies, I always lean toward high-quality, reusable options rather than the flimsy, single-use plastic kits. Investing in a solid set of brushes and a sturdy tray might cost a few extra bucks upfront, but they’ll save you a massive headache (and a lot of landfill waste) down the line.
I also can’t stress enough how much the right foundation matters. If you’re looking for that flawless, velvety look, finding the best paint primer for a smooth finish is your secret weapon. It’s the unsung hero that bridges the gap between a DIY project and something that looks professionally curated. And a quick pro-tip from my morning chats with Fern, my trusty fiddle-leaf fig: don’t rush the math! Take an extra five minutes for calculating how much paint to buy so you aren’t stuck with half-finished walls or a mountain of leftover cans cluttering your sanctuary.
The Art of How to Prep Walls for Painting
Now, let’s get into the real heavy lifting: the prep work. I often tell my Monstera, Barnaby, that you can’t expect a lush canopy if you don’t nurture the roots first—and your walls are no different. Learning how to prep walls for painting is arguably more important than the actual color application. Start by clearing the area and using a damp cloth to wipe away dust and cobwebs. If you have any stubborn scuffs or holes from old command hooks, a little spackle and some light sanding will go a long way. You want a surface that’s as smooth as a polished river stone before you even touch a brush.
Once the surface is clean and dry, don’t skip the most crucial step: choosing the best paint primer for a smooth finish. Think of primer as the nutrient-rich compost of the painting world; it creates a uniform base that helps your color pop and ensures your eco-friendly pigments bond perfectly to the surface. If you’re working with a darker color and transitioning to something lighter, a high-quality primer will save you from needing three extra coats of expensive, low-VOC paint later on.
Pro-Tips for a Flawless, Eco-Friendly Finish
- Choose Low-VOC or Zero-VOC paints to keep your indoor air quality as fresh as a post-rain forest walk; your lungs (and your houseplants) will definitely thank you for the lack of harsh chemical fumes.
- Don’t skip the “test patch” phase—grab a small sample and paint a tiny square on your wall to see how the color dances with your room’s natural light throughout the day, because what looks minty in the shop might look neon at noon.
- Work in small, manageable sections rather than trying to conquer the whole wall at once; it’s much like tending to a new seedling, patience and steady movements lead to much better long-term growth.
- Invest in high-quality, washable finishes if you’re painting high-traffic areas, so you can easily wipe away life’s little messes without needing a full renovation every time a coffee cup slips.
- Always keep your brushes and rollers sealed in airtight bags or wrapped in plastic between sessions if you’re taking a break; it saves water on cleanup and keeps your tools ready for action, just like keeping my watering can primed for a thirsty basil plant.
Bringing Your Vision to Life
As we wrap up this little transformation project, take a moment to appreciate how far you’ve come. We’ve moved from selecting the perfect low-VOC, eco-friendly pigments to the heavy lifting of prepping those walls and gathering the right sustainable tools. It’s easy to get lost in the technicalities of sanding and priming, but remember that these steps are the foundation of a beautiful result. By focusing on quality over convenience and choosing materials that respect both your lungs and the planet, you haven’t just changed a color—you’ve cultivated a healthier environment for your urban sanctuary to breathe in.
At the end of the day, repainting a room is about more than just aesthetics; it’s an act of intentionality. It’s about reclaiming your space and making it a true reflection of the life you want to lead. I was just chatting with my monstera, Fernande, about this, and she seemed to agree that even the smallest changes can lead to massive growth if you give them enough care. So, grab your brush, embrace the process, and remember that every stroke is a step toward a more harmonious home. You’ve got this, and your space is going to thank you for it!



MOST COMMENTED
Health & Lifestyle
5 Fun Fitness Challenges to Help You Stay Motivated
Eco-Friendly
How to Travel Plastic-Free with These 7 Sustainable Products
Tech & Innovation
10 Must-Have Smart Wearables for 2024
General
Why the Secret to a Thriving Urban Ecosystem Lies in the Value of a Boring Weekly Review
Nature & Sustainability
How Sustainable Technology Is Revolutionizing Our Future
Tech & Innovation
Why Quantum Cryptography Is the Future of Data Security
Nature & Sustainability
Affordable Green Energy Solutions for Your Home