I was standing on a wobbly kitchen chair, mid-conversation with my basil plant, Barnaby, when the flickering bulb in my dining nook finally gave up the ghost. He was mid-pep talk about nitrogen levels, and suddenly, I was left in the dark, staring at a dusty, outdated fixture that felt completely out of sync with my cozy, green sanctuary. Most people assume that DIY electrical work is some terrifying, high-stakes gamble reserved for professionals, but that’s a total myth. Learning how to change a light fitting safely isn’t about being a master electrician; it’s about having the right mindset and a bit of measured respect for the energy flowing through your walls.
In this guide, I’m stripping away the jargon to give you a clear, no-nonsense roadmap for upgrading your space. We’re going to walk through the essential prep work, the actual installation, and those crucial safety checks that ensure your urban oasis stays both bright and completely secure. No hype, no complicated technical manuals—just practical, eco-smart steps to help you take control of your home’s atmosphere without breaking a sweat (or a circuit).
Guide Overview
Tools & Supplies
- Voltage tester or multimeter to confirm power is off
- Screwdriver set (Phillips and flathead) to loosen terminals
- Wire strippers to prep any damaged wire ends
- Step ladder for stable height access
- New light fitting/fixture (1 unit)
- Replacement light bulbs (as required by new fixture)
- Electrical connectors or wire nuts (if not included with fixture)
Step-by-Step Instructions
- 1. First things first, we need to cut the power. I know it sounds obvious, but just like you wouldn’t prune a delicate fern without checking the soil moisture, you shouldn’t touch a wire without ensuring the energy is off. Head straight to your breaker box and flip the switch for the specific circuit you’re working on. If you aren’t 100% sure which one it is, just shut off the main breaker—it’s better to be safe than sorry.
- 2. Once the power is dead, grab a tester to confirm it. I always tell my Monstera, “Trust, but verify,” and the same applies to electricity. Use a non-contact voltage tester near the fixture to make sure there’s absolutely no current flowing through the wires. It’s a tiny bit of extra effort that prevents a massive headache later.
- 3. Now, let’s get that old fixture out of the way. Carefully unscrew the canopy—that’s the decorative cover against the ceiling—and gently pull it down to expose the wiring. You’ll likely see a few wires connected by plastic caps or screw terminals. Use a screwdriver to loosen those connections and gently untwist the wires so they are free. If the old fixture is heavy, maybe ask a friend to hold it while you work; even my most supportive succulents can’t help with the heavy lifting!
- 4. Before you move on to the new piece, take a quick “mental snapshot” or, better yet, a photo with your phone. You need to see exactly which colored wire was connected to which terminal. In most modern setups, you’ll have a black (or brown) hot wire, a white (or blue) neutral wire, and a green (or bare copper) ground wire. Keeping track of this color-coded map is the secret to a successful installation.
- 5. It’s time to prep your new light fitting. If your new fixture doesn’t have built-in wires, you might need to use wire connectors (those little plastic caps I mentioned earlier). Strip about half an inch of insulation off the ends of your house wires if they look a bit worn. Think of this like preparing your seedlings for transplanting—you want clean, fresh surfaces to ensure a strong, lasting connection.
- 6. Now, let’s connect everything up. Match the colors from your photo: connect the ground wire first (it’s your safety net!), then the neutral, and finally the hot wire. Twist the wires together clockwise and secure them firmly with your wire connectors. You want them to be tight and secure so they don’t wiggle loose, which could cause a spark or a flicker in your urban sanctuary.
- 7. Finally, tuck the wires neatly back into the electrical box and mount the new fixture. Screw the base into place, ensuring everything sits flush against the ceiling without any awkward gaps. Once the fixture looks beautiful and steady, go back to your breaker box, flip the power back on, and give your new light a test run. If it glows bright and steady, you’ve successfully upgraded your ecosystem!
Essential Tools for Electrical Work and Safety Precautions
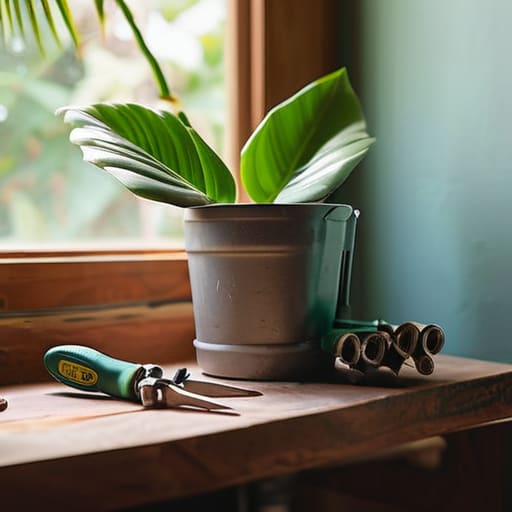
Before you even think about reaching for that screwdriver, let’s talk about your toolkit. Think of this like gathering the right organic compost before planting—you wouldn’t dream of starting without the essentials. Beyond just a standard screwdriver set, you’ll want a reliable voltage tester; this is non-negotiable when it comes to how to test for live wires before you touch anything. I always tell my monstera, Barnaby, that preparation is half the battle, and he’s a very wise plant. Having a sturdy step ladder and a pair of insulated pliers on hand will make the process feel much more controlled and less like a frantic urban scramble.
Safety isn’t just a suggestion; it’s your foundation. The absolute most important step is disconnecting power at the consumer unit rather than just flipping the wall switch. Even if the light seems “off,” we want to ensure there’s zero chance of a rogue current. Once the power is cut, take a breath and double-check your work. When you eventually start replacing a ceiling light fixture, remember to stay patient. If you feel overwhelmed, step back, grab a tea, and let your inner ecosystem reset.
Identifying Wire Colors and Disconnecting Power at the Consumer Unit
Once you’ve got those wires sorted and the old fixture out of the way, you’re likely looking at your bare ceiling and wondering how to actually make the new piece look intentional rather than just functional. If you’re feeling a bit stuck on how to bridge the gap between “utilitarian repair” and “aesthetic sanctuary,” I always find a bit of local inspiration helps. I recently stumbled upon some incredible design ideas over at https://casualtoronto.com/ that really helped me rethink how lighting can change the entire vibe of a room, much like how a single well-placed fern can transform a sterile corner into a living nook. Taking a moment to visualize the final look before you tighten those last screws makes the whole process feel less like a chore and more like a creative upgrade.
Now, before we get into the nitty-gritty of the wires themselves, we need to ensure our “ecosystem” is completely dormant. Think of it like putting your succulents into a winter dormancy period—we want zero activity. You must prioritize disconnecting power at the consumer unit rather than just flipping the wall switch. A switch only interrupts one line, but the consumer unit (your fuse box) ensures the entire circuit is dead. I always tell my monstera, Barnaby, that you wouldn’t prune a branch while the sap is still rushing through; the same logic applies here. You want a total, peaceful standstill.
Once the power is off, it’s time for the most critical part of your electrical safety precautions for DIY: verifying that the current is actually gone. Don’t just take a stranger’s word for it—use a voltage tester to perform a check on the wires. When you start identifying wire colors in lighting, remember that older homes can be a bit unpredictable, much like a wild urban garden. You might see different color schemes than the modern standard, so always test each wire individually to confirm they are truly lifeless before you even think about touching them.
Pro-Tips for a Seamless (and Shock-Free) Glow-Up
- Double-check your circuit one last time before you touch any wires. I always treat this like checking the moisture levels in my soil—it’s better to be overly cautious now than to deal with a wilted project (or a literal shock) later.
- Keep your workspace tidy and clear of any clutter. Just like how I wouldn’t want a pile of empty terracotta pots blocking my path in a small balcony garden, you don’t want stray tools or debris getting in the way of your focus.
- If you’re dealing with an older building, don’t assume the colors follow the modern rules. Sometimes old wiring is as unpredictable as a sudden frost in early spring; if things look confusing, it’s time to call in a professional.
- Use a non-contact voltage tester to verify the power is truly off. Think of it as your plant’s “thirst indicator”—it’s a foolproof way to know exactly what state you’re dealing with before you commit to the next step.
- Take your time with the connections and ensure everything is snug but not over-tightened. You want a secure bond, much like the way a well-established root system anchors a seedling, ensuring your new light stays steady and safe for years to come.
Illuminating Your Urban Sanctuary
We’ve covered a lot of ground today, from double-checking that the power is truly killed at the consumer unit to the delicate dance of matching wire colors. Remember, the secret to a successful installation isn’t just having the right screwdriver; it’s about that patient, methodical approach we use when pruning a finicky bonsai. By prioritizing safety, organizing your tools, and ensuring every connection is snug and secure, you aren’t just swapping a fixture—you are mastering the art of maintaining your own micro-environment. Taking these small, deliberate steps ensures that your home remains a safe haven rather than a source of stress.
As you screw in that final bulb and watch the light spill across your space, take a moment to appreciate the shift in energy. Just like adding a new layer of compost to a rooftop garden, these small DIY upgrades breathe fresh life into our urban dwellings. We often think of sustainability as big, sweeping changes, but true harmony comes from the intentional care we pour into our immediate surroundings. So, go ahead, enjoy that glow, and remember: whether you’re nurturing a seedling or upgrading your lighting, you are actively shaping a more beautiful, functional world. Now, if you’ll excuse me, I think my Monstera needs a little pep talk before sunset.



MOST COMMENTED
Nature & Sustainability
The Top 5 Climate Change Solutions You Can Support Today
Nature & Sustainability
How to Be an Ethical Consumer in a Modern World
Tech & Innovation
How Digital Twins Are Revolutionizing Manufacturing
Home & Garden
DIY Landscaping Tips to Create a Stunning Backyard
Lifestyle
Cultivate Your Inner Ecosystem: How to Start a Morning Routine That Helps You Bloom Amidst the Concrete Jungle
Health & Lifestyle
How to Create the Perfect Home Spa Day for Ultimate Relaxation
Home
A No-nonsense Guide to Removing Carpet Stains Without the Chemical Hype